Growing Potatoes in Florida
The potato is one of America's most popular vegetables. Each year, Americans eat an average of 125 pounds of potatoes per person. Solanum tuberosum--also called the Irish potato--is a cool season crop. During the winter and spring months, Florida's commercial farms grow and supply much of the country with "new" potatoes.
A home-grown and freshly harvested potato tastes very different from one that has been sitting in storage or on a grocery shelf for months. Growing potatoes in Florida can be fun and easy by following our recommendations.
Nutrition & Safety
On average, potatoes contain eighteen percent starch, two percent protein, and small but necessary amounts of vitamin B6, iron, niacin, magnesium, thiamine, folic acid, and potassium. They are also a good source of vitamin C. A medium potato contains about seventy-five calories, slightly more than an apple. Potatoes are low in sodium, essentially fat-free, and easy to digest.
Avoid eating green tubers. Green tubers have relatively high levels of solanine (glycoalkaloid), which has a bitter taste. Solanine is found throughout the plant, but it is especially concentrated in unripened potato tubers, green tubers, and in new sprouts. It is toxic at very low levels. Tubers can "green" when exposed to sunlight in the field, in storage, and at home.
Growth Cycle
The growth cycle of the potato can be roughly divided into five stages.
- Sprout development. The eyes of the potato develop sprouts, which emerge from the soil.
- Vegetative growth. The leaves, stems, and root system form, photosynthesis begins, and the plant prepares to store nutrients in tubers.
- Tuber initiation. Tubers begin forming on the end of stolons (underground stems), usually before the plant flowers.
- Tuber bulking. Tubers enlarge. Sugars and starches accumulate.
- Maturation. The tubers reach full size. The top of the plant dries out and dies. During maturation, the tuber skin toughens, extending storage life.
Varieties
Growing potatoes in Florida produces different commercial varieties from those grown in other parts of the country. Most U.S. growers produce russet potatoes. This variety does not grow well in Florida because it can take up to four months to produce tubers. The late maturity of russet potatoes makes them more susceptible to diseases, pests, and bad weather.
In Florida, the popularity and success of potato varieties depends on factors such as yield, disease resistance, quality, and adaptability. The following are the Florida's most popular potato varieties.
White-skinned Potatoes
- LaChipper is Florida's current standard commercial white-skinned potato. It yields well under our winter growing conditions. It has a buff to white skin color and a moderately smooth skin texture. Tubers are mostly round with relatively shallow eyes.
- Sebago is a traditional Florida variety with moderate yield, buff to white skin color, and a slightly netted skin texture. Tubers are round to oblong with moderately shallow eyes. Long-time residents in potato-growing areas of Florida appreciate the exceptional flavor of this potato variety.
- Yukon Gold is a relatively new variety that can be found year round in the produce section of the grocery. It has moderate to high yield, buff to white skin color, and a moderately smooth skin texture. Tubers are mostly round with relatively shallow, pink eyes. These potatoes are well known for their yellow flesh and great taste.
Red-skinned Potatoes
- Red LaSoda is north Florida's current standard commerical red-skinned potato. The plant produces well and matures early. The tubers have a moderately smooth bright red skin and relatively deep eyes.
- LaRouge is south Florida's current standard commerical red-skinned potato. It produces a moderate to high yield. The mostly round tubers have relatively deep eyes and moderately smooth skin texture. The bright red skin color and the good boiling quality make LaRouge a popular variety across the state.
Russet Potatoes
Florida does not have a standard commerical russet variety. When choosing a russet variety for your home garden, select varieties that mature relatively early so that the potatoes can be harvested during the cooler months of the year.
One relatively short-season russet is Russet Norkotah, which matures 100 - 115 days after planting in Florida. This potato produces high yields of brown to dark brown tubers that have a heavy russet or netted skin texture. They are oblong to long with a shallow to intermediate eye depth and are exceptional baking potatoes.
Other Varieties
Many new and exciting varieties--such as red and blue flesh potatoes and fingerling types--are now available through reputable catalogs and garden supply companies on the web. Make sure to purchase early-maturing varieties so that they can be planted and harvested in the cooler months of the year.
Part of the fun of home gardening is exploring unusual varieties that cannot be purchased in the supermarket. Try new varieties and share them with your friends!
Planting
Soil Preparation
To grow a healthy potato crop, you must properly prepare the soil before planting. Potatoes thrive in a loose, well-drained, slightly acidic soil (pH 5 - 6). Most Florida soils will probably not need much treatment, unless you live in an area with a high water table where periodic flooding occurs.
Potatoes do not grow well in flooded conditions, so make sure that excess water drains from the root zone. To drain the root zone, establish the beds at least ten to twelve inches above the level of the soil. Elevating the beds ensures that plants are above any standing water.
In well-drained soil, organic matter--compost, rotted-manure, green manure--aids in water retention and contributes essential nutrients as it decomposes. This organic matter breaks down quickly in Florida's hot, humid climate, so be sure to add more each year.
Fertilization
Potato plants are heavy feeders and require adequate nutrition throughout the growing season. To determine what kind and quantity of nutrients to apply to the soil, get the soil tested by a qualified laboratory. Contact your county Extension office for local fertilization recommendations. Your county agent can help you interpret soil test results and determine which nutrients are deficient in the soil.
Florida soil generally requires the addition of nitrogen and potassium each potato season. Nitrogen and potassium are typically applied at least twice during the season. Apply half of the fertilizer at planting and the remainder during the season. More fertilizer may be necessary during periods of heavy rainfall.
At planting, apply about 0.75 lbs of nitrogen and about 0.5 lbs of potassium per 100 ft of row. This is roughly equivalent to 7.5 lb of a 10-0-10 complete fertilizer at each application. Any recommended phosphorus or other nutrients should be mixed into the soil at planting.
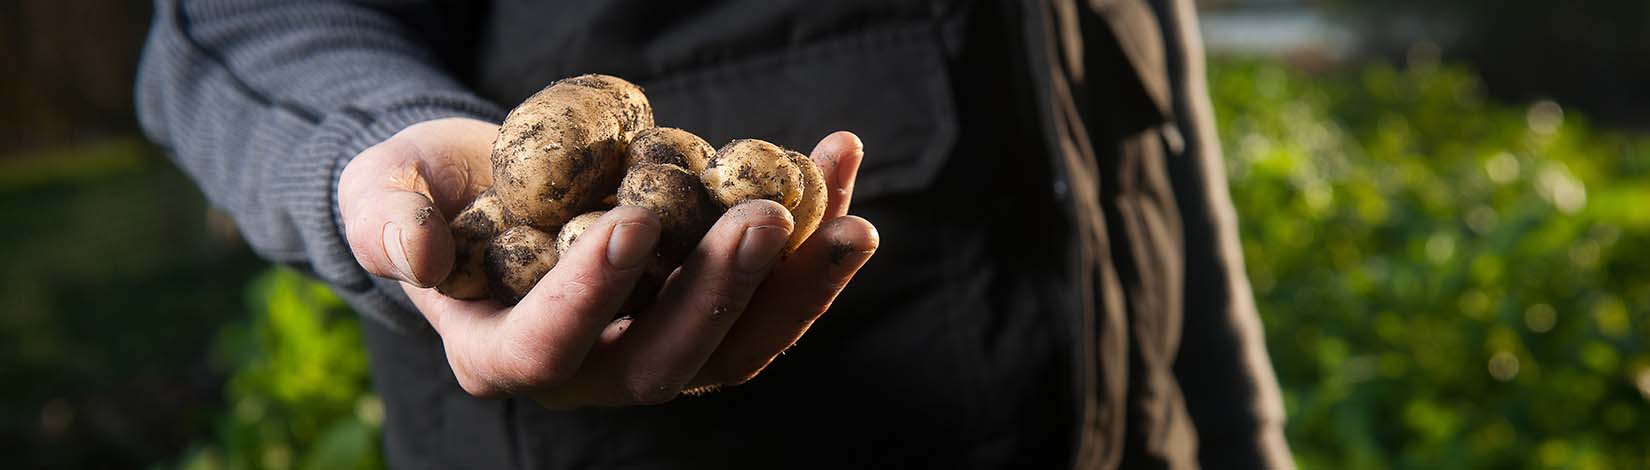
Seed Piece Preparation
To start growing potatoes in Florida, you plant the potato tuber. When the tuber is planted, it is called a "seed" potato. Only certified seed potatoes should be planted in your home garden. Certification insures that the seed tubers are free of disease. You can buy certified seed from a number of reputable garden supply stores.
Do not plant potatoes from the grocery store in your home garden. These potatoes may carry harmful potato diseases that will hurt the growth of your crop. Tubers from the grocery store may also be treated with sprout inhibitors that may prevent the plant from growing in your garden. In addition, grocery stores carry many different varieties of potato. If you find a variety you like, you may not be able to find it again in future seasons.
New potato plants grow (sprout) from the buds (eyes) on the skin surface of potato tubers. When one or more of the eyes begin to sprout, the tubers are ready to cut into seed pieces. You can also cut the tubers before the eyes sprout. Cutting the potato into seed pieces will cause more eyes on the seed to sprout.
Potato tubers are naturally dormant for a period of time after harvesting. Sprouting at the eyes indicates that the tuber is no longer dormant. To break dormancy, store dormant tubers in a lighted area at room temperature for a few days. Do not store tubers in direct sunlight.
Cut your seed potatoes so that each piece is about the size of an egg with at least one eye per seed piece. When cutting seed, try to make as few cuts as possible. Typically one pound of potatoes will make about six to eight seed pieces.
Allow cut seed pieces to "heal over" before planting them. To heal cut tubers, leave them in a dark, humid, well-ventilated place at a temperature of 60 - 65° F for one or two days. Seed pieces can be planted directly after cutting, but doing so increases the risk that the tubers will rot before sprouting.
Plant Spacing
Rows should be at least thirty-six inches apart. Within the row, place the plants about six to eight inches apart. Plant the seed pieces four inches below the soil surface with the cut side down and the eyes (sprouts) facing up.
During the Growing Season
Potatoes growing in the garden will need periodic attention. Giving your potatoes more attention will improve the quality and quantity of tubers at the end of the season.
Hilling
Because seed pieces are planted only four inches below the soil surface, the sprouts may push up above the soil surface. Exposed tubers will turn green in the sun, making them inedible (see Nutrition). Hilling--adding soil from the furrows between rows to the top of the potato row--protects the new sprouts.
To prevent tubers from getting sunburned, add two or three inches of additional soil on the potato row when the sprouts emerge from the soil. Depending on the depth of planting and dormancy of the seed pieces, sprouts usually emerge approximately ten to fourteen days after planting.
Fertilization
Approximately three to four weeks after planting, place the remaining fertilizer--0.75 lbs of nitrogen and 0.5 lbs of potassium per 100 ft of row--in a band about four to six inches to either side of each plant. The fertilizer should be buried about two inches deep.
Irrigation
Growing potatoes in Florida is typically done during the drier season of the year: winter and spring. Supplemental irrigation may be required in some years to provide plants with water. Maintain moderate soil moisture levels throughout the season. When soil moisture levels increase or decrease drastically over a short period of time, rough-skinned and/or knobby tubers can result.
Potato roots do not grow well in wet conditions. Over-watering washes fertilizer out of the root zone--making it unavailable to the plant--and promotes root and tuber decay. Small plants have a smaller root zone and require less water than mature plants, so adjust your water applications accordingly.
Weeds
Weeds can be a big problem for potatoes because they compete for light, water, and nutrients. They can also host insects and diseases. Mulches--either plastic or organic--can be used to suppress weeds.
For potatoes in the home garden, hand cultivation is the most frequently-used weeding strategy. Be careful not to injure the potato plant's shallow root system or the tubers near the soil surface. If you use herbicides, make sure they are labeled for use on potatoes, and always follow the instructions on the label.
Insects
Insect damage can severely reduce tuber yields. Insects that can cause injury to potato plants and tubers include Colorado potato beetles, flea beetles, aphids, leafhoppers, and wireworms.
Crop rotation is one of the best preventative measures against insects. Potatoes should be planted in the same part of the garden only once every three years. Because pests can live in nearby weeds, removing weeds also helps control insects.
On smaller plantings, you can remove larger insects by picking them off the plants by hand. For large plantings, it may be more practical to use pesticides intended for the home garden. Follow all label instructions, and pay attention to all cautions and warnings.
Diseases
Plant diseases can also injure potato plants and tubers. Early blight, late blight, and rhizoctonia are a few fungal diseases that commonly strike Florida potatoes.
- Early and late blight cause the most injury to the plant tissue. These diseases cause lesions to appear on the stems and leaves of the plant. They develop rapidly in wet conditions and cause the plants to lose their leaves or rot completely.
- Rhizoctonia can attack both the stems and tubers. It can rot the plant at the soil line and cause raised black spots on the tubers.
- Leafroll and mosaic viruses can also injure the potato plant. Symptoms include stunting, leaf curling, and a general yellowing of the plant. If you suspect that any plants have a virus, remove them from the garden.
- Corky ringspot is the symptom of the tobacco rattle virus, which is transmitted by the stubby root nematode and causes a lesion on the tuber. Plant parasitic nematodes are microsopic worms that live in the soil and feed on plant roots.
Prevention
Many fungal diseases are spread through water. Avoid walking through the garden while potato leaves are wet. Water the garden in the morning to allow leaves enough time to dry before evening, or apply water in the furrow between raised potato beds. These methods will reduce the amount of water standing on the leaves and lower the chances of disease.
Planting certified clean seed potatoes can also help keep your plants free of disease. To reduce possible sources of disease, destroy piles of rotten potatoes, plants, and other crop residue. Pesticides are available to help control certain diseases. Follow all label instructions and cautions when using pesticides.
Inclement Weather
During the season, potato plants should be protected from excessive rain or irrigation. Never allow plants to grow in standing water, which can reduce yields by causing rot and plant death.
Freezing temperatures can also damage potato plants. Although the potato plant is tolerant of cool weather, it cannot handle temperatures below freezing. When freezing temperatures are forecasted, cover very small plants (three to four inches) with soil. Cover larger plants with freeze protection fabric. To prevent injury to the plants, remove these materials as soon as temperatures warm above freezing.
Harvest & Storage
Vine Killing & Harvest
Most potatoes are ready for harvest 80 - 115 days after planting. If the potatoes will be stored after harvest, the plant should be allowed to mature (die) before harvesting the potatoes. If a plant has not begun the maturation stage on its own, you can induce maturation by killing the tops of the plant. Harvest the tubers approximately two to three weeks after the plant has died.
To harvest, carefully dig potatoes and remove them from the root system of the plant. Discard the seed piece--if it is still on the plant at the end of the season--and any green tubers.
For the home gardener, harvesting can be done mechanically by cutting the plants at the soil surface with pruning shears or a knife. The top of the potato plant can be discarded. Leave the potatoes buried for two to three weeks after removing the tops so that the tubers can mature. Cover any exposed tubers with soil. The mature tuber has a tough skin that rubbing will not easily remove. A mature tuber will store much longer than an immature tuber.
To harvest potatoes, carefully dig below the potatoes with a shovel or spading fork and lift the potatoes. Shallow digging may damage the tubers and limit their storage life.
Storage
Keep potatoes in a dark, well-ventilated cool place (60 - 65° F) for ten to fourteen days after harvest to allow cuts and bruises to heal. Move them to a final storage location with a high relative humidity, good aeration, and colder temperature (38 - 40° F). The tubers may sprout at warmer temperatures.
Be sure to remove any damaged or rotten potatoes prior to placing the crop in long term storage as these will produce a nasty smell and greatly shorten the storage life of the rest of the crop. If you wash the tubers, allow them to dry thoroughly before storing. Under proper conditions, potatoes can be stored for three to six months or more.
Tuber Yield
A 100-foot row can produce from 150 to 300 pounds of potatoes depending on the variety and the year.
Adapted and excerpted from:
"Growing Potatoes in the Florida Home Garden" (HS933) by Jeffery E. Pack, James M. White and Chad M. Hutchinson. Published by: Horticultural Sciences Department (reviewed 02/2016).
What We Can Help With
 Agriculture
 Natural Resources
 4-H Youth Development
.jpg) Lawn & Garden
Lawn & Garden
 Family Resources
.jpg) Learning Opportunities
Learning Opportunities
Resources
Other UF/IFAS Sites
- Gardening Solutions
- Entomology and Nematology Department
- Environmental Horticulture Department
- FAWN: Florida Automated Weather Network
- Florida-Friendly Landscaping™ Program
- Florida Master Gardener Program
- IPM Florida
- Pesticide Information Office
UF/IFAS Publications
State & Federal Agencies
- Florida Department of Agriculture and Consumer Services (FDACS)
- Florida Department of Environmental Protection (FDEP)
- Florida Energy Systems Consortium (FESC)
- U.S. Environmental Protection Agency (EPA)
- USDA Plant Hardiness Zone Map--U.S. National Arboretum
Organizations & Associations
- American Community Gardening Association
- American Horticultural Society
- Florida Native Plant Society
- Florida Nursery, Growers and Landscape Association (FNGLA)
- North American Native Plant Society
Other Sites & Publications
UF/IFAS Mobile Web Apps
Plant Hardiness Zones