![Hands sift through compost ready for use. [credit: uf/ifas]](/media/sfylifasufledu/sarasota/images/banner1650x470/2015_Comms_T4_compostHands_1650w.jpg)
SELF-CONTAINED COMPOST BIN
In order to better contain the potential odor and animal-attracting nature of an open compost bin, we developed this pattern for a simple, turnable, covered compost bin for our dog-waste composting.
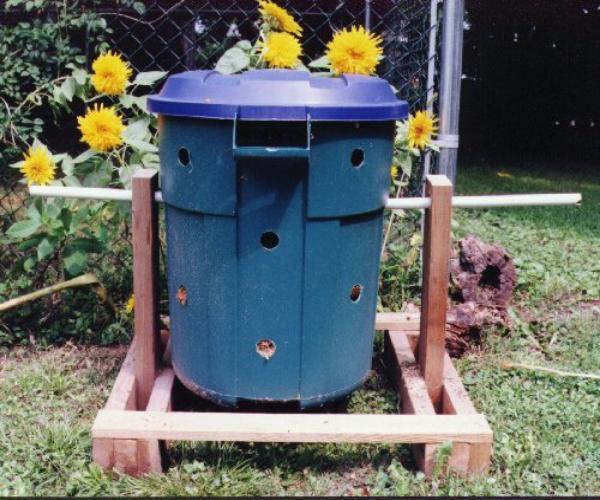
Self-contained compost bin
Materials
- Plastic or metal garbage can with a lid. Any size will do. We found the 20-24 gallon size most manageable. Avoid brittle plastic cans as they will be hard to drill holes in
- 4-foot long section on 1-inch dowel (or old broom or mop handle)
- About 14 feet of 2 x 4 stock (pressure-treated is best)
- About 6 feet of 1 x 3 stock (pressure-treated is best)
- OPTIONAL: One or two elastic cords to hold lid on can if necessary
- OPTIONAL: Long-stemmed thermometer
Construction Details
-
Drill 1/2- to 1-inch holes in the garbage can and lid. Space the holes 6 to 8 inches apart. Do not drill holes in the bottom of the can. Holes can be drilled randomly around the can and lid with one exception. You must drill one set of 1-inch holes on opposite sides of the can to allow for the broomstick turning pivot. These holes should be a few inches above half the height of the can for best turning results.
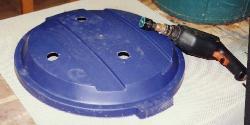
Holes in bin lid
-
Cut four 24- to 36-inch lengths of 2 x 4 stock for the base, and four 6-inch lengths of 2 x 4 stock to use as spacers. Cut two lengths of 2 x 4 stock about 36 inches to function as the center supports. Make sure the center supports are tall enough to allow the can to rotate freely. For most garbage cans, 36 inches is appropriate. Cut two 24- to 36-inch lengths of the 1 x 3 stock. These should be wide enough so the garbage can fits with extra space between the two supports.
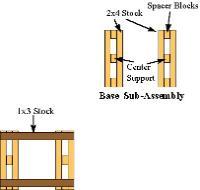
Spacers and supports
-
Drill a 1-inch hole 2-3 inches from the top of each center support. These holes will accept the broomstick pivot for the can.
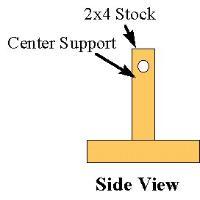
Stock and center support
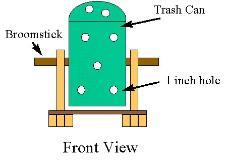
- Assemble the pieces as shown in the diagrams above. First, construct the two base components. Make a sandwich of 2 x 4 lengths and 6-inch spacers. The center of each base component should be the center support, standing straight up, perpendicular to the base to form a T shape. After constructing the two base components, add the 1 x 3 lengths to connect the two components.
-
Insert the broomstick through one center support, then through the garbage can, then through the other center support.
Broomstick/rod insert
Learn More
- Natural Resources